So, it feels a little ridiculous writing our very first blog post about our refrigerator, but it’s the fridge that started us on a series of projects early this year. You see, our refrigerator was a beauty…. shiny stainless steel, with amazingly bright LED lighting, and it came with a built-in Kuerig! Um, yes, our refrigerator could make a plethora of hot and delicious drinks at the push of a button. However, this lovely appliance was not without its share of problems, primarily its size (because yes, when it comes to refrigerators size definitely matters!).
We have a large family, and this refrigerator was sadly counter depth. What does that mean? Well, it meant that as wonderful as this refrigerator was, every time we went grocery shopping, I cringed at the thought of having to go home and play Tetris with all our perishable items. Pizza boxes, nope. Thanksgiving dinner leftovers, bigger nope. Three gallons of milk (to support the growing boys around here), ha ha ha, it was never gonna happen. So, we needed a solution because struggling with our refrigerator was getting old.
Mike and I have been talking about renovating our kitchen, which is still in the planning phase, but the challenge of our tiny refrigerator got us thinking outside of the box. We only needed an extra six inches of depth to make a standard refrigerator work, and lucky for us, the wall behind the fridge was in our mudroom.
Side note: I’m not personally a fan of mudrooms as to me they feel like a family dumping ground for junk and since most garages open straight into a mudroom, it’s like being smacked with a reminder of your families clutter every time you enter your home, but I digress…
We started chatting about the prospect of taking the much needed six inches away from the mudroom to support a larger refrigerator in the kitchen, and suddenly we had a very viable solution to our dinky fridge problem (and we’d take the opportunity to make the mudroom a little more functional for our family too)! The project would be a win/win and we were ready to get started.

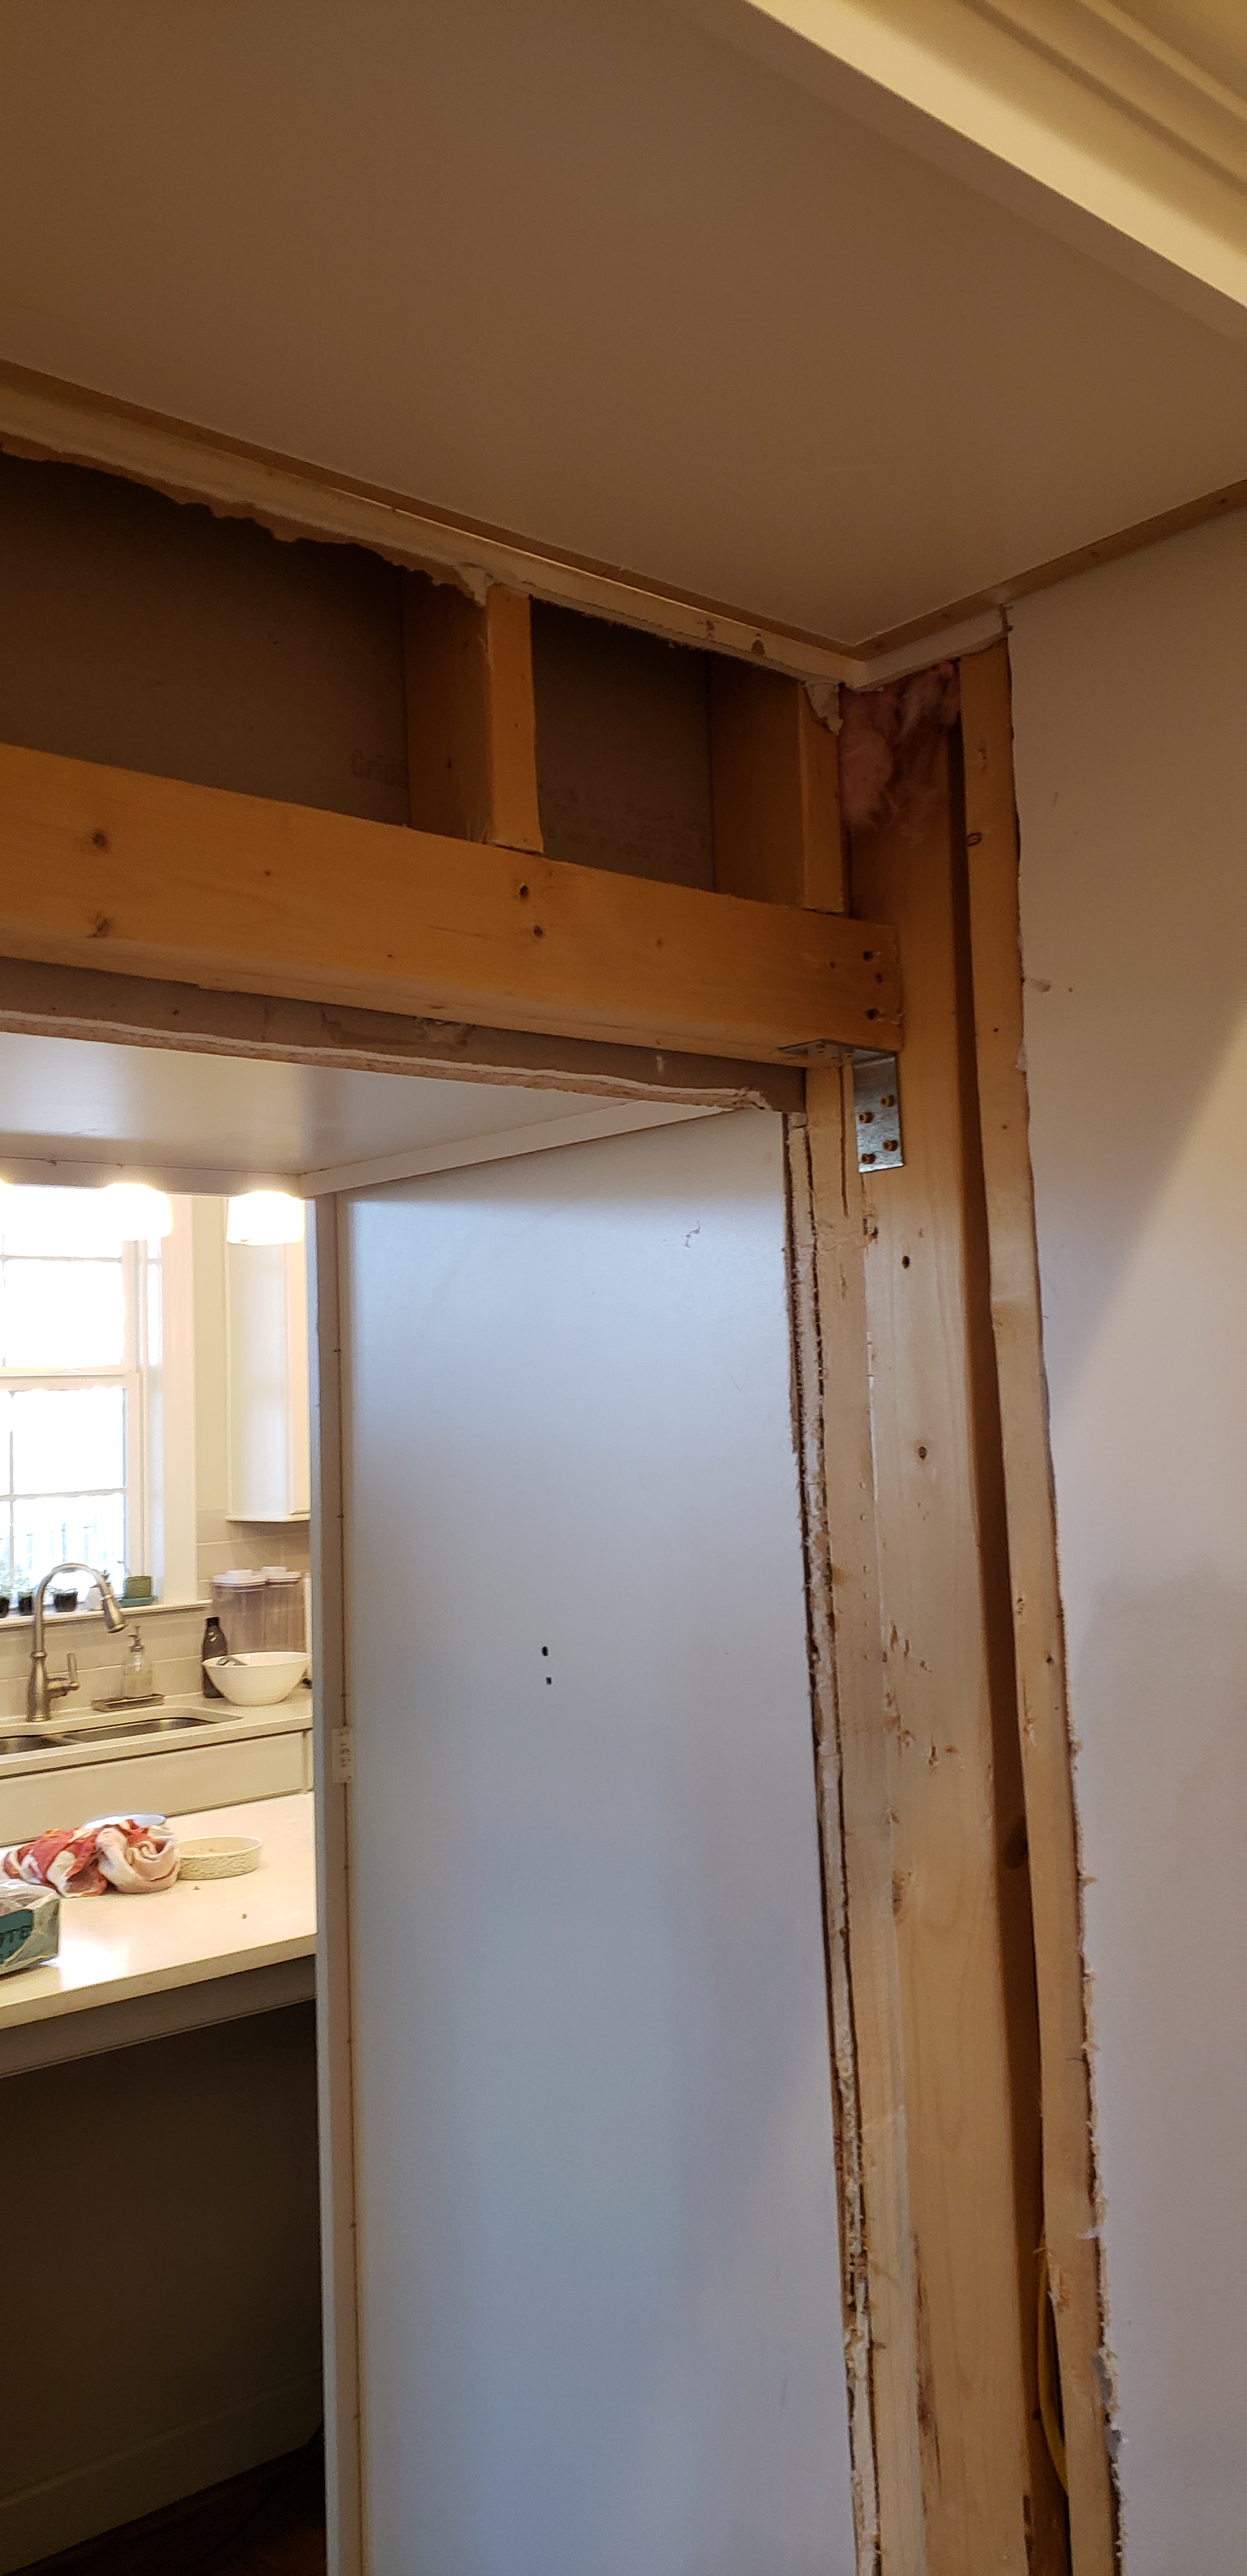
Don’t be fooled the project started with a lot of ground work, research, and measurements. First we needed to know the exact size of the fridge we were planning to buy, but once we had that info, we were able to start expanding the existing opening.
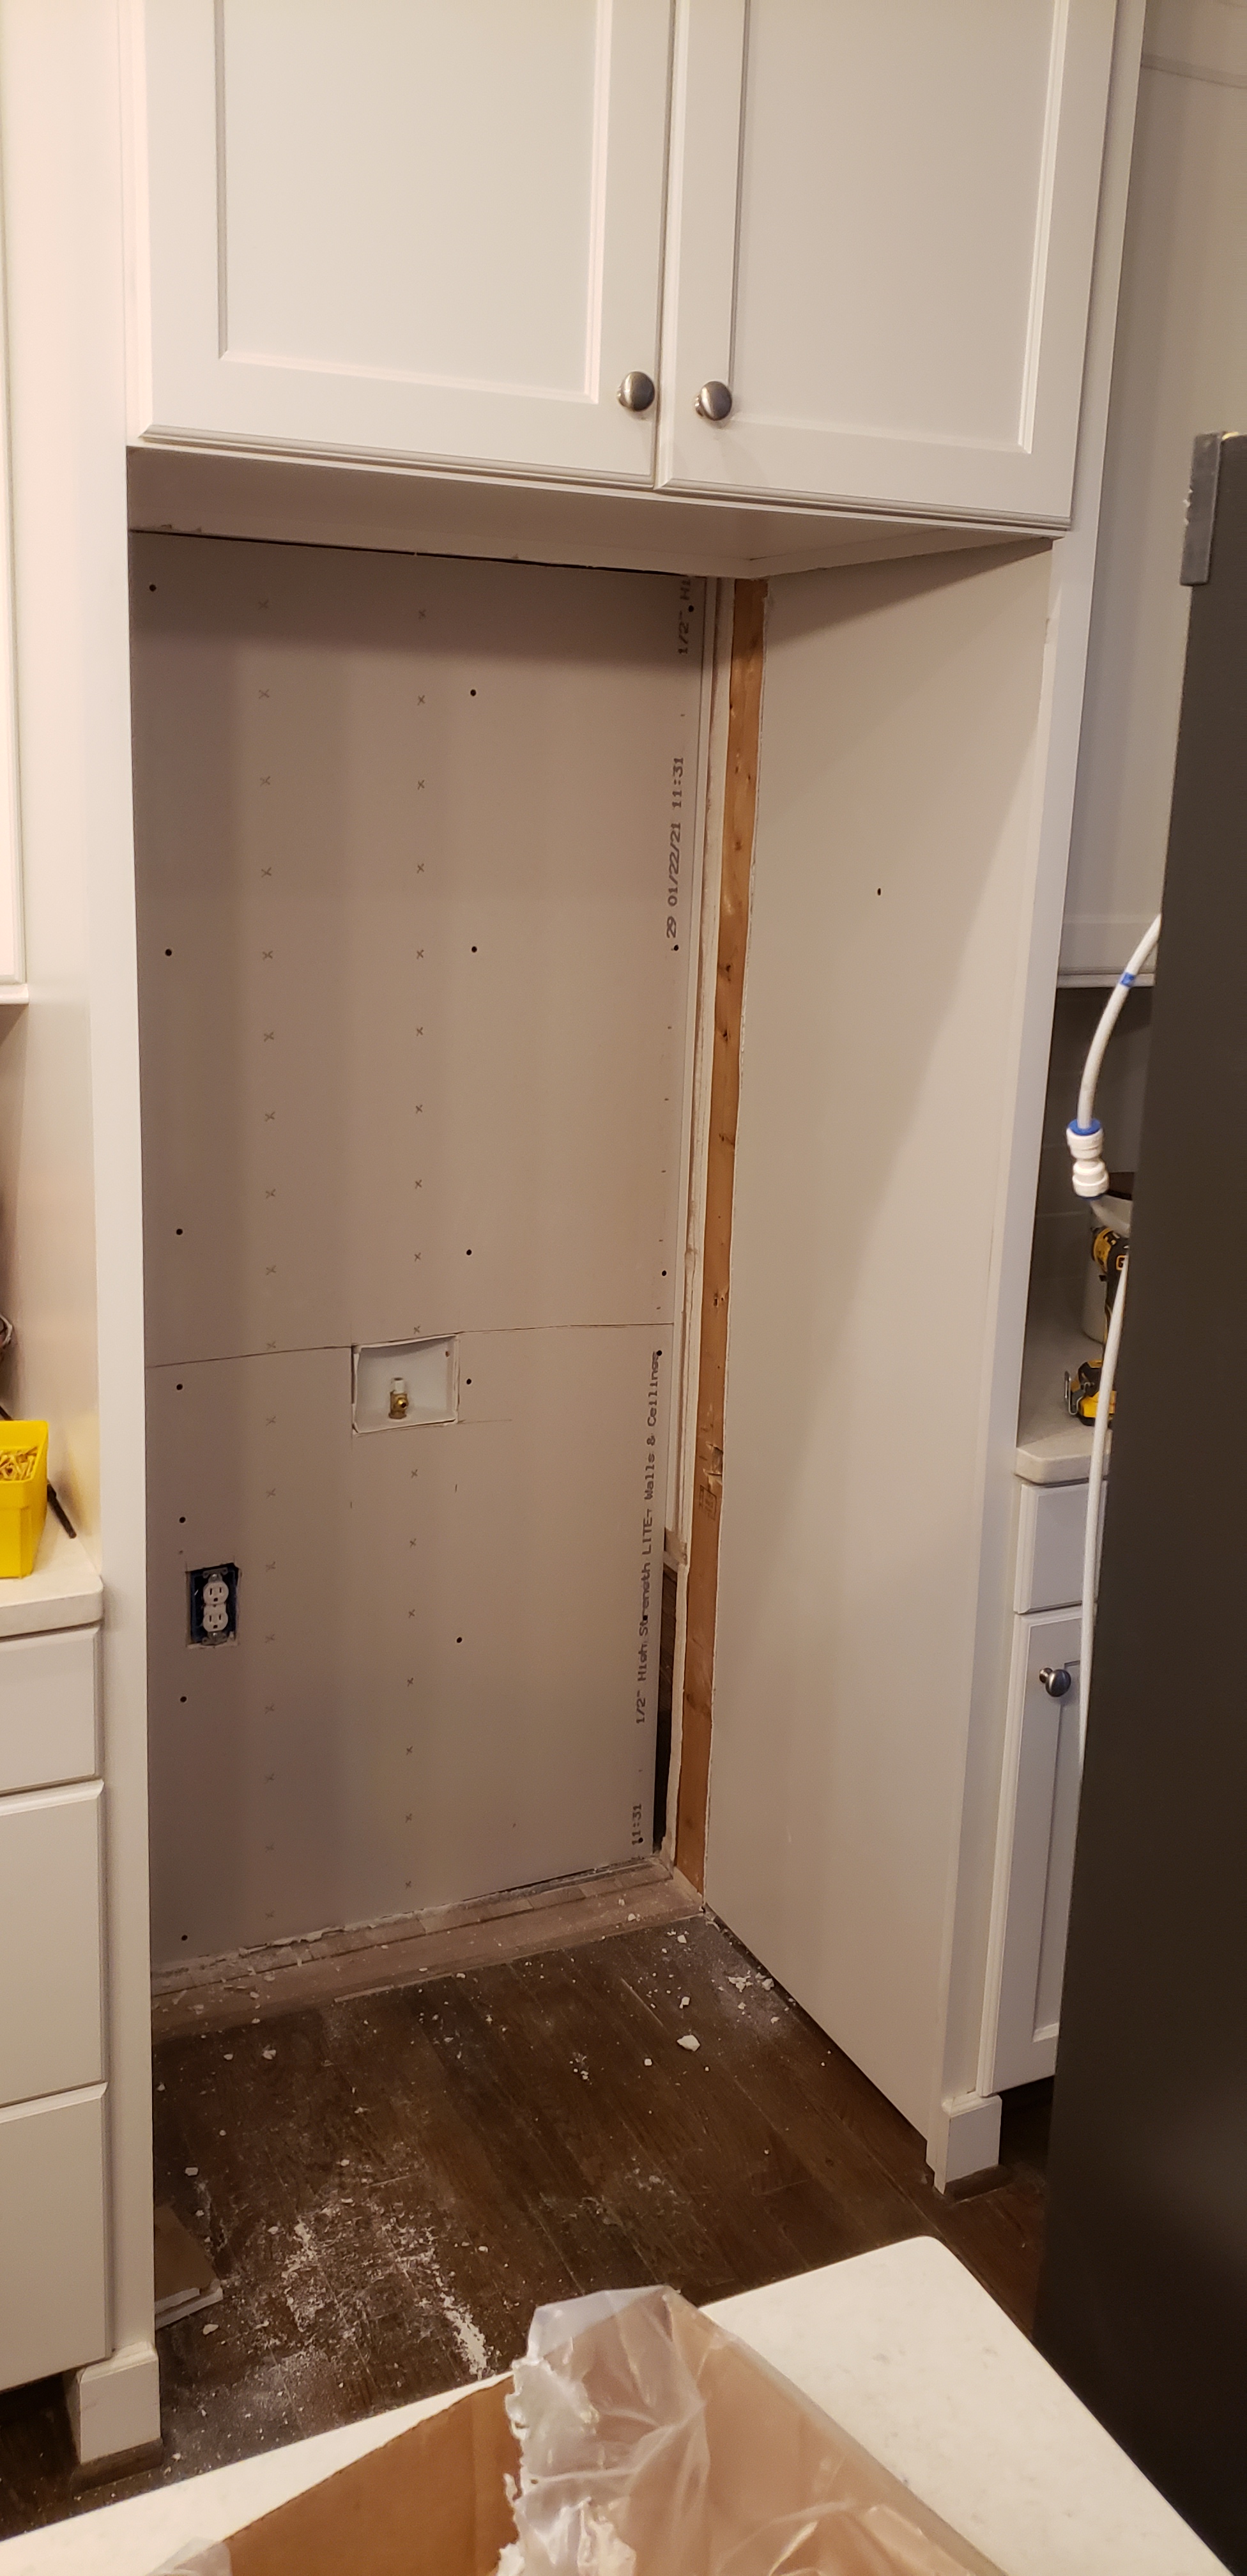
We started by disassembling the built-in bench in our mudroom to make way for the wall being pushed back. We got super lucky in that the placement of our existing refrigerator did not require us to move the built-in shelving adjacent to the bench seat. After demo was complete we added a 4×4 header into the existing wall (similar to a door way header to keep the integrity of the wall intact) and installed a soffit to bump the fridge cavity back.
After everything was done, the moment of truth came a few days later when the new standard depth refrigerator was delivered. I think Mike and I both held our breath as it slid into its new home for the very first time, hoping we hadn’t spent the last few days tearing apart our house (and making a huge mess in the process) for nothing. Alas, our new refrigerator fits! I personally think its just as pretty as the last (although our kids are trying super hard to prove that fingerprint resistant stainless steel is a myth), and Mike loves to stare into the refrigerator and comment on how empty it looks even right after we get home from the store with a full load of groceries.


Next up, mudroom makeover!
